
If a risk discussion keeps jumping between causes, incidents and consequences, use a bow-tie to separate them. Put one clearly defined event in the middle, then examine what could lead to it and what could limit the harm afterwards.
Bow-tie analysis explained: the shape, and why it works
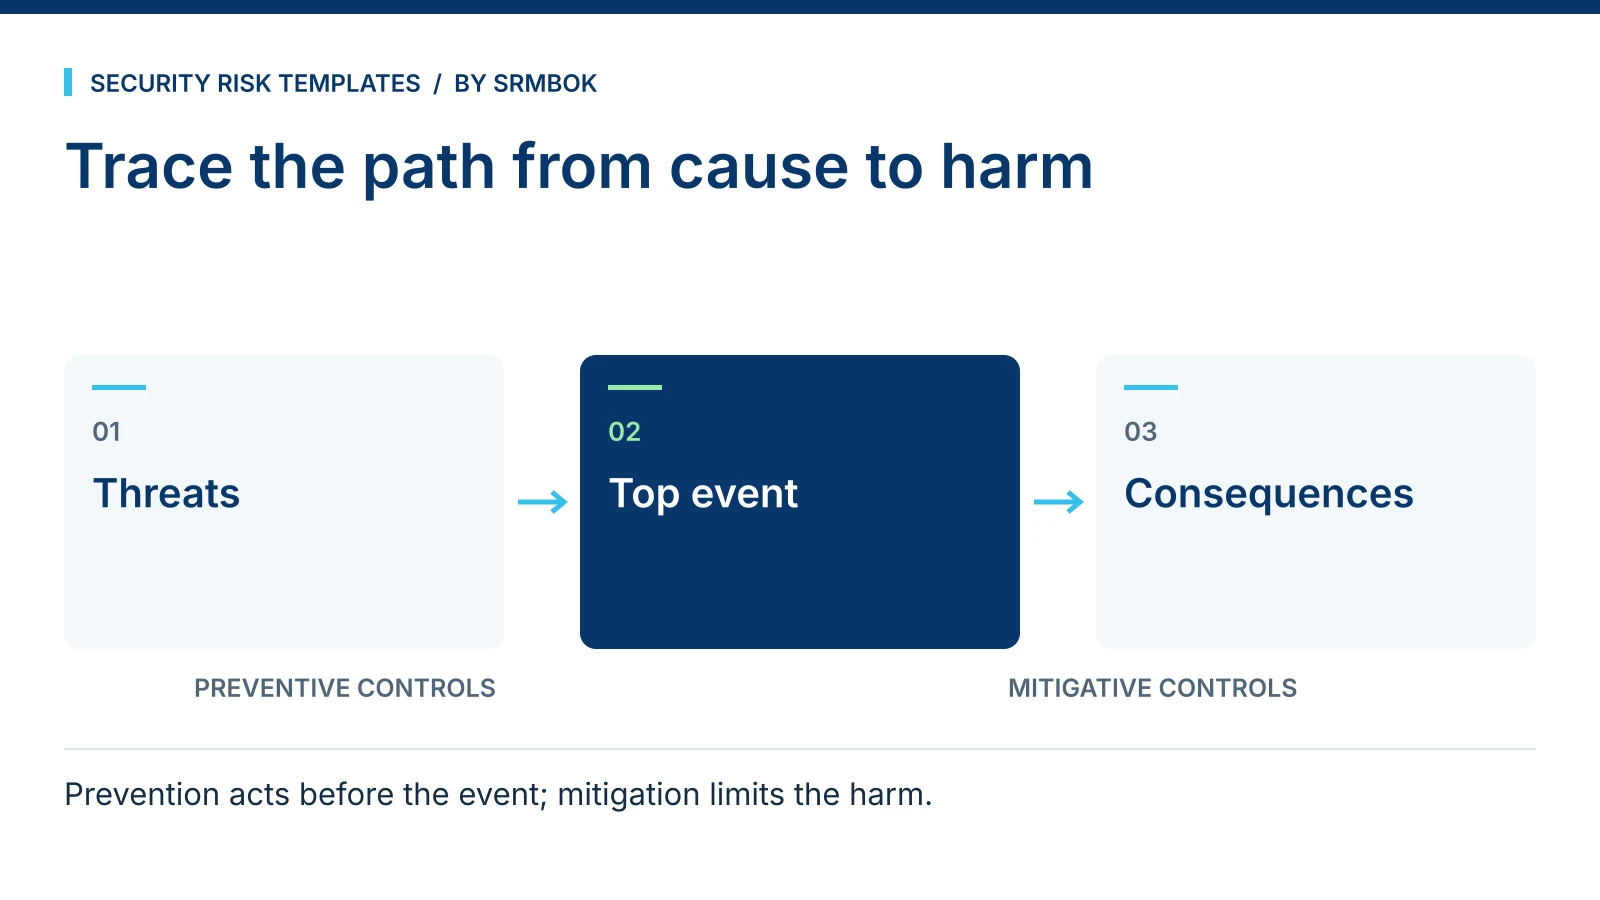
Draw a knot in the middle. That knot is the focal event — the moment something goes wrong that you are specifically worried about, such as "unauthorised person gains access to the server room." On the left, branching into the knot, are the threats or causes that could lead to that event: a stolen access card, a propped-open fire door, a contractor issued credentials nobody revoked. On the right, branching out from the knot, are the consequences if the event happens and nothing stops it escalating: data theft, equipment damage, service outage, reputational harm.
Between each cause and the knot, and between the knot and each consequence, you place barriers — the controls that are supposed to stop a cause from reaching the event, or stop the event from becoming a consequence. That is the whole shape: causes, barriers, event, barriers, consequences. It looks like a bow-tie because that is exactly what it looks like on the page.
The value is not the diagram. It is the discipline of naming, for every single line crossing the page, a specific control that is supposed to be sitting on it. A cause with no barrier drawn in front of it is a gap you did not know you had until you tried to draw it.
The Swiss cheese model of control gaps
Bow-tie analysis borrows a well-known idea from safety science: no single control is perfect, and every control has holes, like a slice of Swiss cheese. A card reader can be defeated by tailgating. A CCTV camera can have a blind spot. A background check can miss something. Several effective controls can reduce the chance that a threat passes through every barrier. They do not guarantee prevention: shared dependencies, common failures and gaps in implementation can weaken several controls at once.
The failure mode bow-tie analysis is specifically good at catching is when the holes do line up: when several controls that look independent on paper actually share the same weakness. If your card access control and your visitor sign-in process both rely on the same untrained receptionist noticing something is wrong, you do not have two barriers. You have one barrier, drawn twice.
Escalation factors
A barrier is rarely all-or-nothing. It works, until something specific undermines it. In bow-tie terms, that undermining condition is an escalation factor, and it gets attached directly to the barrier it weakens.
"Staff challenge unfamiliar visitors" is a barrier. "Staff are new and have not been trained on the challenge procedure" is the escalation factor sitting underneath it. Writing the escalation factor down next to the barrier, rather than leaving it as background knowledge in someone's head, is what turns the diagram into something you can actually manage — because now there is a named condition to monitor, not just a control to assume is working.
A worked example: fire risk at a manufacturing site
Take a fictional mid-size manufacturer, Ashgrove Components, running a bow-tie on the focal event "fire in the paint booth area."
Causes (left side):
- Solvent vapour ignited by static discharge
- Overheated extraction fan motor
- Unauthorised hot work near the booth
Barriers between causes and the event include explosion-proof electrical fittings, scheduled extraction system maintenance, and a hot work permit system.
Consequences (right side):
- Fire spreads to adjacent storage
- Production line shutdown
- Injury to booth operator
Barriers between the event and consequences include automatic fire suppression, fire-rated separation walls, and evacuation drills.
Run the workshop properly and someone will ask the useful question: does the hot work permit system actually get checked, or does it exist as a form that gets signed retrospectively? That question is the entire point of the method. A permit system that is a genuine barrier and a permit system that is a piece of paper look identical on an org chart. They do not look identical once someone in the room has to defend, out loud, why it counts as a real control.
Running a session in fifteen minutes of real time (not the whole workshop)
A full bow-tie workshop for one focal event typically runs longer than fifteen minutes once you include genuine debate about barrier effectiveness. But the shortest useful version of the exercise looks like this:
- Agree the focal event in one sentence, specific enough that everyone pictures the same scenario.
- List every plausible cause without judging them yet.
- List every plausible consequence without judging them yet.
- For each cause and each consequence, name one existing barrier.
- Ask, out loud, for each barrier: "what would have to be true for this not to work?" That answer is your escalation factor.
Even a rushed pass through those five steps surfaces gaps that a narrative risk description usually hides, because a paragraph of prose can gesture at "adequate controls are in place" without anyone having to name one.
Common mistakes
- Naming a policy as a barrier instead of a practice. "We have a hot work policy" is not a barrier. "Hot work near the booth requires a signed permit checked by the shift supervisor before work starts" is.
- Collapsing multiple causes into one vague line. "Human error" is not a cause you can put a specific barrier against. Break it into the actual failure — tailgating, misconfiguration, an unlocked door — and the barrier becomes obvious.
- Choosing a focal event that is too broad. "Security incident" produces a diagram with dozens of unrelated causes and consequences tangled together. "Unauthorised access to the server room" produces a usable one.
- Skipping escalation factors entirely. Without them, every barrier looks equally solid, and the diagram cannot tell you which one to worry about first.
- Treating the finished diagram as the deliverable. The diagram is a record of a conversation. If the conversation did not happen — if one person filled it in alone — the barriers on it have not actually been tested against anyone else's knowledge of how the site really works.
Learn the method properly
This is the shape of bow-tie analysis, not the full method. The Risk Bow-Tie Method eBook is Julian Talbot's 16-page introduction covering focal event selection, the Swiss cheese model of control gaps, escalation factors, a worked factory-fire example and workshop methodology in more depth than a fifteen-minute read allows. If you want prompts to help draft causes, consequences and barrier language, see Thirty ChatGPT Prompts for Security Risk Practitioners (Free). For a related way of making a control picture legible to non-specialists, Security Enclaves: Explaining Segmentation to a Board in One Picture is a useful companion, and if your team needs a quick reference once the workshop is done, Free TLP Wall Chart for Your Security Operations Centre is worth having on the wall.
Download The Risk Bow-Tie Method eBook and run your first proper session with the method behind you, not just the shape of the diagram.